Introduction to Herbal Guide to Stevia Leaf: How to Grow, Harvest, and Prepare the Stevia Plant
Chances are, you’ve seen packets of stevia in your local coffee shop. But did you know that the stevia plant can be grown in your own backyard? Here’s everything you need to know about how to grow, harvest, and enjoy stevia leaves at home. Stevia has become all the rage lately, and for good reason!
It is ano-calorie,plant-based sweetenerthat is 200 times sweeter than sugar. Green stevia leaves can be grown in the home garden and harvested to make a huge number of sweet-tasting recipes thatwon’t spike insulin or cause inflammation like sugar does. I love the flavour of green stevia, and I regularly give visitors stevia leaves from my garden to taste. They often have the same look after tasting it: a combination of “Wow, that’s sweet” and “Hmmm, it doesn’t taste like sugar.” That’s because people tend to think of stevia as a diet product or a sugar replacement.
Even though it is often marketed that way,the stevia plant is an herbwith a wonderful flavour and a great many uses. If you are trying to kick a sugar addiction, stevia very well may help, but it should also be appreciated for the herbaceous, green, sweet flavourthat is uniquely its own. Jump ahead to… After I gave birth to my son, my hormones got all messed up, and I felt awful. I went to talk to my doctor about what could possibly be making me so tired, puffy, sluggish, and craving food all.
the. time. It didn’t make any sense to me. I exercised regularly and followed the Canada Health guidefor eating a balanced diet: everything in moderation, lean meats, a rainbow of fruits and vegetables, low fat, and whole grains.
I was doing everything right. But I felt terrible. And I was always starving.I craved sugar like it had an all-powerful control over me, and I couldn’t figure out why. When I asked my doctor if I could possibly beinsulin resistant,she said, “Oh, you most certainly are.” I was shocked!
I asked, “Why didn’t you tell me this before? Can’t you do something about it?” She replied that what you do about it is what I was already doing: following a healthy diet and exercising regularly. Clearly, that was not working. I changed my diet dramatically bycutting out all sugar: sugar, honey, maple syrup, and even fruit.
Yes, even fruit. I also cut out anything that my body could easily convert to sugar: carbs. Then, I cut out all grains and all starchy vegetables as well. Finally, I added more healthy fats into my diet, organic and grass-fed meats, and lots and lots of green vegetables.
These changes made an enormous difference in how I felt almost immediately. At first, I felt horrible. I was so sick and felt like I was going to die as Idetoxed from sugar. But then, after a few weeks, I started to get much better.
I had more energy than I’ve ever had in my life.I felt much lighter and less puffy.And I lost a ton of inflammation, which helped to reduce my chronic pain dramatically. The numbers showed why I felt so much better. When I first had my blood tested, it showed a very high level of insulin resistance, and I looked like I was well on my way to developing diabetes.Within 6 months of a sugar-free diet, I’d cut that number in half.Within a year, I had completely reversed the insulin resistance. And then my doctor asked me to teach her what I had done!
It took a ton of willpower to cut out sugar for good. No sugar. At all. Not even on my birthday.
Yup, that’s right, no birthday cake. Living sugar-free is not easy. Sugar is in absolutely everything. It’s part of every celebration and social gathering.
And it’s the first thing that your body wants when you’re hungry. Your body knows to ask for that quick fix of something sweet so that it can give you a burst of energy. And it tastes so good. So, so good.
I was committed to kicking sugar in all its forms so I couldstop the cycle of insulin resistance and build a better life.I wanted to have the energy to be able to raise my son. And live a long life to see him grow up. Needless to say, cutting out sugar has been a lifesaver for me. But also, it can be a bummer to have to pass on your favourite treats.
I looked into how I could use something herbal and natural to create recipes that I loved that don’t replace sugar but are even better. That taste delicious, sweet, and green – just how I want to live my life! That’s where stevia (and the stevia plant!) comes in. There used to be controversy around stevia, particularly in the United States, where it wasbanned because there were not enough studies to say whether or not it was safe to consume.
Even products like aspartame and other artificial sweeteners (oh, and sugar) were deemed safe to be sold on the market. I won’t go into the politics behind sugar andsweetenersbecause there are more than enough resources out there to shed light on those issues. I can only speak to howeverything that I do for my own personal health and the health of my family has to make sense and feel good to me. In short, when I can grow an herb in my garden organically, I have a lot more trust in its safety than I do in man-made or synthetic products.
The stevia that you buy at the grocery store is very different than the stevia plant you grow in your garden. When I first tasted stevia,it was in a powder form from a packet, and it tasted quite bitter and very sweet. Honestly, I did not like it at all. But when I started growing the stevia plant in my garden, I experimented a lot to find ways that it could help me feed my sweet tooth while doing good things for my body.
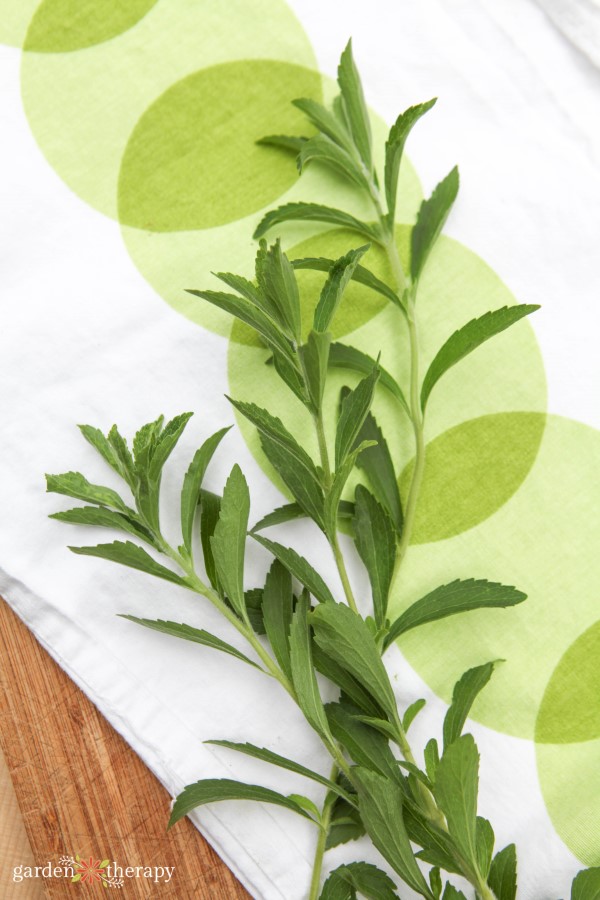
As an artificial sweetener, stevia is often either aclear liquid extract or a white powder. Essentially, what’s been done is the sweet component of stevia has been extracted and added to either a powder or a liquid like alcohol or glycerin so that it dilutes the sweetness and helps to remove some of the bitter aftertastes. Green stevia, orStevia rebaudiana,is what you’ll grow in the garden. It grows like an herb with serrated-edged leaves and is native to South America.
Indigenous peoples of South America have used the stevia plant for hundreds of years, both medicinally and as asweetening agent. Theflavour of green stevia leaves reminds me of a bit of green tea mixed with sweeteners. It is quite sweet, so a little goes a long way. Over the past three years that I have been growing and testing out stevia in various recipes, I have learned how to harvest and prepare it so that I don’t miss sugar one bit.
And, more importantly, stevia helps me to stay away from sugar so that I don’t fall off the wagon. I’m not the only one who noticed a change! In a2010 study, stevia has been shown tosignificantly lower insulin and glucose levels. The plant can help tokeep blood sugar levels in check.
And as a nonnutritive sweetener, it has no calories. When you look at stevia as a herb, you see it in a whole new light. The herbal properties of stevia help toscrub away the biofilm in the gut, which can hide bacteria and cause digestive problems. The stevia allows your good gut flora to neutralize the bad flora.
Plus, you’re not adding sugar and therefore avoiding a bad bacteria gut party. Most of all, it works well tokick that sugar habit. Since it’s so much sweeter than regular sugar, a little goes a long way. One stevia plant can provide you with more than enough sweetness for your daily cravings.
Stevia leaves have not been approved by the FDA for commercial use, so you can only grow and use stevia leaves from your garden. Little research has been done on using stevia leaves. But in my experience, they’re a wonderful alternative and have made all the difference in kicking my sugar habit. Grow green stevia infull sunin containers or inloose, loamy, well-draining soil.
Space plants 18” apart so they can fill out and grow 12-36″ tall. Likebasil, if you continue topinch the plant backand use the top leaves, it will become bushier and fuller with stronger stalks. Stevia can begrown from seed in the winter or from rootedcuttings. As far as herbs go, growing stevia takes a little more effort than most.
They require some heat to get started, and it may take a few practice seedlings. Green stevia can overwinter inzones 8and above, although the older the plant, the tougher the leaves become. It’s better to start new cuttings or new seeds each year for the freshest stevia. Prune back your stevia plant a few times throughout the growing seasonto prevent flowering and to encourage branching.
Once the plant flowers, the leaf flavour becomes less appealing. Similar to most herbs and vegetables that you eat for their leaves, once the plant energy starts to go into flowering, the leaves become bitter or less flavorful. Stevia plants are now usually available at yourfavourite garden center in the herb section. Since most plants from garden centres have been treated with pesticides, don’t eat the stevia leaves right away.
Wait for new growth, prune back your stevia plant, and enjoy the new (untreated growth) for consumption. If you’regrowing stevia from seed, I recommendWest Coast SeedsandRichters Herbs. If youpruneback your stevia plant a few times in the year, you’ll have plenty to use fresh and in recipes throughout the summer months. Check out the deliciouscoconut ice cream and melon dessertthat Chef Andrea from Burdock & Co made from my garden stevia when I hosted a garden-to-table event there last year.
Remove the leaves from the stems and use the leaves to make fresh tea or liquid extract. You can alsodry the leaves by tying the stems and bundles and hanging them in a cool, dark placeuntil the leaves dry. In the fall, harvest the entire plant after the weather has dipped. Cooler temperatures enhance the sweetness of stevia leaves.
Harvest green stevia in the morningwhen it has the highest sugar content. To dry stevia,cut the stems and bundle them together with garden twine. Hang them upside down on an herb drying rack in a cool, dark place out of direct sunlight. When there is no moisture left, you can remove the leaves andstore them in Mason jars or grind them into a powder.
Now that you have your stevia plant harvested and dried—what do you do with it? Depending on the form of the stevia, you can use it for many different things, including smoothies, coffee, and even baking.Dried stevia powder, the leaves themselves, and a liquid sweetener are all great ways to use the herb. To make a green stevia powder that can be used in baking recipes,take the dried leaves and put them in a powerful blender or food processor(I use the “dry ingredient” attachment on myVitamix) to create a very fine powder. Even though this powder may be quite fine,it will not dissolve in liquids.
Instead, it will just float to the top, so you probably won’t want to use it in your morning coffee. I like to use it in baking and in recipes where it is dispersed throughout, like in a mousse. Use fresh or dried stevia leaves to sweeten tea.Add one small bit of leaf to hot water in combination with your othertea herbsto add a natural, earthy sweetness. Stevia will not steep in cold water so the water must be warm in order to release the sweetness.
Always keep in mind that stevia is so much sweeter than sugar that you only need a little bit as it will go a long way. Making an extract involves adding the stevia leaves to a liquid to draw out the flavours. You then strain out and discard the leaves, leaving you with a sweet stevia extract that is easy touse in liquids like tea, soda, smoothies, and other recipes where powdered stevia would not dissolve. I likethis recipe for making stevia extractbecause you can make it in alcohol, but there are also instructions on how to dealcoholize it if you wish.
I hope that the stevia plant changes your life for the better as it did mine. Let me know in the comments how you use stevia, and feel free to share your favourite recipes! A city girl who learned to garden and it changed everything. Author, artist, Master Gardener.
Better living through plants.
Best Practices
Quality Materials
Start with quality materials and tools to ensure the best results for your gardening projects.
Follow Instructions
Carefully read and follow manufacturer instructions for plants, products, and equipment.
Regular Maintenance
Establish and maintain regular maintenance schedules to keep your garden healthy and thriving.
Keep Records
Document your gardening activities, successes, and challenges to improve over time.
Troubleshooting Common Issues
If you encounter challenges, consider these solutions:
Research First
Research specific requirements for your plants and garden situation before implementing solutions.
Seek Expert Advice
Consult local gardening experts or extension services for personalized guidance.
Community Support
Join gardening communities to learn from others' experiences and get peer support.